 Set Selection Filter ( Drawing Editor )
Also see :
- Edit Selection Filter (for editing custom filters that you " Save ")
- Select Items (mode the selection filters operate in)
- Shift (hold key down to select a group of filters)
- Ctrl (hold key down to deselect or select individual filters)
- Esc or Enter (closes the window -- selected filters remain active)
- Keyboard shortcuts for selection filters
- Selection filter (toolbar decoration)
page 1 | contents | tools > | selection
Step-by-step instructions :
Selection filters can be used in the Drawing Editor to set the types of items that can be selected in Select Items mode.
|
|
|
1 . Invoke the selection filter using any one (1) of the following methods:
Method 1 : Choose Tools > Set Selection Filter .
Method 2 : Use a keyboard shortcut .
Method 3 : On your toolbar, click the Set Selection Filter icon, which is pictured above. If the icon is not currently on your toolbar, you can add it using Toolbar Configuration .
Method 4 : On the selection filter decoration, select ' Custom '.
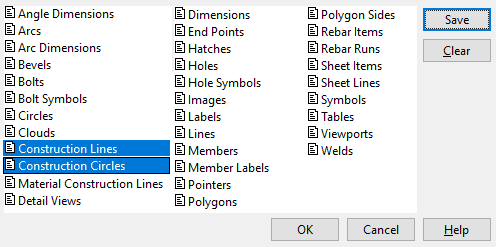
2 . On the Set Selection Filter window, select one or more filters. Hold down the Shift key to select a range of filters. Hold down the Ctrl key to toggle filters on and off. Press the " Clear " button if you to use the ' Default ' filter.

|
Filters are named after the items that become selectable when that filter is selected on this window. A list of items that you can select using these filters is provided here . You can optionally do step 2a to test the filter(s) you have selected on this window. Step 2b tells you how to " Save " a custom filter set. |
2a (optional) : While the Set Selection Filter window is still open, you can optionally select items in the model using the filters you have set in order to test how those filters behave.


Select Items mouse bindings Selection is done when you click Select or Select + on an item, or draw an area box . The filters selected in step 3 limit the items that you can select to specific object types.
2b (optional) : You can optionally press " Save " to open the Custom Filter Save window and give the custom filter a name.
Custom Filter Save Custom filter name:
Con Lines & Circles 
Possibility 1 : If you type a " Custom filter name " and press " OK ," please note the following:
3 . When you are done using the Set Selection Filter window:
![]()
![]()
Alternative 1 : Press the " OK " button to close the window. The filter that is currently selected on the Selection filter toolbar item remains selected after the window closes.
Alternative 2 : Press the " Cancel " button to close the window, but without applying any of your changes. The selection filter that was active before you opened the Set Selection Filter window will be active again.
page 1 | contents | tools > | selection | top
 Examples :
Example 1: In Select Items mode with the ' Default ' filter or ' All ' selected, you can double-click on most types of objects to open the edit window or a review window for that object type. An exception is end points , which do not have edit windows.
Example 2: With the ' Dimensions ' filter selected in Select Items mode, you can easily stretch/move dimensions without selecting other types of items by accident.
Example 3: With the ' Polygons ' filter selected in Select Items mode, any polygons that exist on your current drawing are highlighted as you pass your mouse pointer over them. On a member detail, materials are polygons. Double-click a polygon to do a Review 2D Item .
Example 4: With the ' Holes ' and ' Bolts ' filters selected, you can select holes and bolts regardless of whether they were added using Hole Add or Add Bolt or were originally auto detailed .
page 1 | contents | tools > | selection | top
 When ' Default ' is the selected filter :
The ' Default ' filter lets you select any type of object other than construction lines , construction circles , material polygons and sheet lines . Viewports must be selected by drawing an area box from right to left . Origin symbols can also be selected, but you need to invoke Move/Stretch to relocate them.
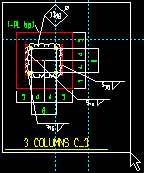
| Here's a view selected by area box in Select Items mode with the ' Default ' filter selected. Note that the construction lines are not selected. | ||

|

|

|
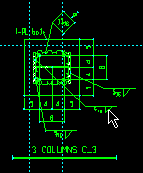
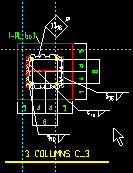
| 1 . Select the objects. In this example, by area box . | 2 . Grab anywhere on the group then drag the group to a new location. | 3 . Release the mouse button, then click in space to deselect the objects. |
Tip: When ' All ' is the selected filter, you can also select construction lines, construction circles, polygons and sheet lines.
page 1 | contents | tools > | selection | top
 When ' Material Construction Lines ' is the selected filter :
|
Material construction lines are construction lines ( or construction circles ) that have been added to a drawing using Construction Line Add Material . They are marked internally to be distinct from other construction lines. Selecting the ' Material Construction Lines ' selection filter limits selectability to material construction lines.
page 1 | contents | tools > | selection | top
 When ' Viewports ' is the selected filter :
In Select Items mode, you can click user-named viewports to select ( Select ) or multi-select ( Select + ) or multi-deselect ( Select- ) them only if ' Viewports ' is the selected filter.
When ' All ' or ' Default ' is the selection filter, you cannot click on viewports to select them in Select Items mode. With these selection filters, you need to draw an area box from right to left to select a user-named viewport.
Selecting of viewports must be done on the original drawing that the user-named viewport was originally added to. You cannot select viewports in this way on a sheet item . Selecting of viewports may be done in order to perform an Viewport Edit or Viewport Erase operation. The box for " Viewports " must be checked (
) on the Display Options window in order to select a viewport.


